Pages - Menu

Showing posts with label photography. Show all posts

Saturday, May 26, 2012

Completed Labels

      This morning I finished designing the labels for my wet plate collodion chemistry. This afternoon I printed them and laminated them. I went to Office Max to have them laminated and noticed the thinner laminate works much better when bending around bottles. The thicker laminate they have is to sturdy to bend and created some issues and needed to be worked a bit more to adhere to the bottle. I used Super 7 glue and nitrile gloves. Make sure to clean the surface of the bottle you are working on.


Images of the labels being prepared and adhered:


Office Max print 35 cents  and laminate is about $1.50 so all together I got everything done for $8.00.


Friday, May 25, 2012

Wet Plate Collodion Logos

        Hello! I have designed these labels for wet plate collodion photographers to easily mark their bottles. I have included the silver nitrate and distilled water labels on this post, but you can find all the labels on my facebook page .They are free to use go ahead and copy as many as you like and use them. I plan to print them on an aged paper and then have them laminated to then adhere them to my fixer and water tanks and bottles. I have includuded lines for amount, date, and the photographers name. I hope you enjoy them. Feel free to visit my website: www.JesseeStJohn.com.


Tuesday, March 13, 2012

Collodion Process

     The other day when I wrote my review on my new chemical formulas and their success it was right before class so I could not add these pictures. Here are some images showing more of the set up of the shoot and the images developing.


   The hideous yellow color I painted my box really helps! It is so bright, but the visibility is way worth it! I feel like my dark box is a bumble bee.


Plates drying.


Right out of the wash and now placed in the sodium thiosulfate.


I do not know if it is just me, but sodium thiosulfate takes forever! I am probably going to switch to rapid fix really soon.


Slowly, but surely.


Sunday, March 4, 2012

Upgrade


       So I have been working on ways to upgrade my business and branding. The way I started in photography was shooting cars and in that lifestyle culture branding is everything! Everyone knows Cadillac's emblem from Chevy's and the differences between the two. It is automatic when you see a 1956 Cadillac and a 1955 Chevy there is a different attitude, style, and marketing plan for each. Chevy was the average Joe where as the Cadillac was the supreme luxury car for the Don Draper's of the world. Long point short I want my branding and name to be "cool". I want my style of photography to stand out and be recognized easily on the low rider or hot rodder scene. So change of name and logo. A lot of updating because presentation is everything! Not everyone knows what wet plate collodion photography is, but everyone knows the old wooden cameras with the dark clothe over them and Civil War photographs. To make it simple new name: Jessee St. John. It is androgynous and easy to remember. I am working on a new website, new business cards, and a fancy new mobile dark box. Long way to go, but these upgrades and minor adjustments will pay off when meeting new potential clients. 


Friday, January 20, 2012

The Box and my Booth at the Folk Tree Jan. 21st-22nd

     Things are finally coming together! I know this is certainly a learning stage and will be making these boxes for many years to come. So here is my first almost completed box. It needs the glass and the plate needs to be varnished, but other than that I did it! I know it is not history correct, but I like this open shadow box effect and I can hang it on a wall.
    Also, John and I went this morning to an estate sale. Found some awesome vintage goodies including an original never used 1940s "Exposure Meter" and two sets of 1948 Pin Up playing cards never opened. A very successful morning of treasure hunting. I also got these two wood inserts for $1.00


Before Shots of the Wood


  Painted the smaller frame with a Montana Chrome spray paint. Still needs two more coats.


I made the outer wood frame this morning and here is the oval frame painted with the Montana brand spray paint in Copper. I plan to use this case to frame my first 8x10 ambrotype.


    Back to the smaller case I first made. You can see the red is much brighter. This is before I added the black velvet piece inside to hide the messy paper fold.


Here it is! My first case! The plate needs to be varnished and I need to put clear glass inside to protect it. But otherwise a long a tedious experience. I know the rest of the cases will go much smoother!

Also make sure you check out the FOLK TREE in Pasadena tomorrow from 2-6pm I will have a booth and be showing my work and explaining the process. Due to weather the portraits will be taken next week. Thank you and see you there: 217 S. Fair Oaks Pasadena 626.795.8733


A Dream Come True


   Talk about a big break in the week! A big thank you to Michelle Mills and Sarah of the San Gabriel Valley Tribune! Also a big thank you to the Folk Tree's curator Gail. This week has been one of the hardest and hearing my mom call me at 5:30am to tell me my article is amazing and to hear her joyful for the first time in a month was awesome! 
    I am very thankful and very appreciative that I am able to share my art and thank you to everyone for their support! I am very proud to be from Pasadena and apart of the San Gabriel Valley. So thank you everyone and hope you enjoy the article. 


Thursday, January 19, 2012

Never Ending

     This week has been full of bad fortune and loss. My grandmother passed away early this morning and my dog Whiskey now only has one eye. Through all that I am still working on these ambrotype cases. I have been to Harbor Freight about four times since Tuesday and Sears four times since yesterday on the hunt for the perfect saw. I have gone through three saws. One table saw from Harbor Freight, a Craftsmen fixed miter saw from Sears, and finally my Craftsmen compound sliding miter saw. Long story short I had to convince the guy at Sears to sell me the display and I have to go back and re-purchase the table saw from Harbor Freight sometime this weekend. Oh did I mention the weather man says it is going to RAIN THIS WEEKEND!? This weekend I am scheduled at the Folk Tree! UH.....


Here are some pictures with accompanying helpful hints.


Here is the saw that solved all the problems. The pre-cut Hobby wood I get from Lowe's is 6"inches in diameter and the stationary miter saw would not reach through the wood. I love this saw and would say it is awesome. Doing angled cuts on this bad boy is a bit scary, but perfectly fine. The laser also is actually accurate unlike the stationary saw from Craftsmen.


After cutting the wood here are my first two practice boxes.


Here is one of the boxes from Michael's. I am practicing wrapping it with paper. Using a super thin material like paper is way easier to wrap a box. It comes out much cleaner and fits together much nicer. There is one paper which I wrapped my box in I got from Michael's for $1.99 and it is between a paper and fabric. It does not tear easily and has a fabric velvet feel to it.


After I wrapped the box. I went to wrap the second side and realized it was lopsided.


Constructing and gluing together one of my cases/shadowbox.


Gorilla wood glue, but it takes forever to dry.


This spray paint from Blick for around $8.00 has made a huge difference to my wood trim. This paint really makes the wood look like a decorative metal foil. I am so thankful I found this stuff! I also bought a chrome/silver to use when I layer the frames.


In person it looks like metal! I did two more coats after this one to really make it shine.


The shadow box was really deep and I wanted to lift it just a bit so I added another sheet of wood inside.


In the gap I plan to drop in another wood frame to go on the outside of the gold metal one. I need the Harbor Fright table saw to cut the small pieces at a 45 degree angle.


The box is glued and ready to go!


I lightly sanded the box and then I wrapped it in paper. 


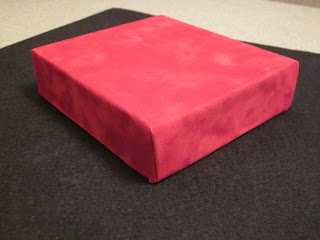
The true color of this is the red curtain you see at the movie theatres. Still working on this folding business, but I have imrpoved greatly.


Feels like a velvet and is bright bright red. In the store it looked more muted in the store.

Monday, January 9, 2012

Burnishing Workbook No. 5

  
 Mark Osterman introduced to the wet plate collodion facebook page burnishing. He posted a gorgeous image and said he burnished the plate and then added finely ground pastels. I definitely want to try this and I did. He said it really gets a full effect after your varnish the plate, (which I plan to do later), but I wanted to show my results. I hope you can see the metallic effect and the cool gray he mentioned. If you look at the image on the right you can see in the sky some of the scratches from my rookie technique. I used my finger and cotton pads. His idea of "polishing" the silver on the plate to produce different hues and tones really is astonishing. I feel so lucky to have been on facebook and seen this post! Thank you Mr. Osterman!

Please visit Scully and Osterman's website to see their work.

Sunday, January 8, 2012

24th Birthday

     The fixer box was a complete success and is leak proof.... one issue though... do not have enough silver bath to fill it. Such a lame mistake to make, but that is OK. On my birthday I did get to photograph my sister for her Vintage Valentine's Day portrait. Her and I always have so much fun dressing up and working on creative projects. She recently graduated from UC Santa Cruz and has her bachelors in Art History, and she works at the MAH in SC.

Through the ground glass. Love this picture of my sister!


Make-up shot. She is wearing my wig and her lipstick is Cyber by MAC. Foundation Christian Dior Forever and Clinique gel black liner.


Color photo of the make-up and wig

Here I am holding the first plate of the day. It is my second favorite from the shoot, but to modern for what I had in mind. Totally love the look in Rachael, reminds me of when we were itty bitty kids.


 There is my new camera being used with the 4x5 reducing back and my chemicals set to the left. Used my trooper to give us some privacy because we were shooting in my drive way.


Hands down my favorite plate of the day. Describes everything I was going for. Elegant, timeless, and just a lovely portraits of my sister to show to all her friends and one day her kids.


Screen shot of my screen editing the images of Rachael. I am so behind on my editing, but things keep coming up. For these images I plan to try something that was discussed by Mark Osterman on the Wet Plate Collodion facebook page... burnishing and using finely ground pastels to apply color before varnishing. Lets say burnishing...from what I have experienced.... is awesome. I tried it tonight using my finger and cotton balls and it made a huge difference. I was trying to scan the plates and use my cellphone camera to capture the metallic effect and it just is not working right. What I am holding in front of me does not compare to what is showing on the screen. Burnishing is something I plan to continue experimenting with. I am no pro, but the effects I got with just trying it a few moments ago was really beautiful.